How to Make a Treasure Map
Creating a treasure map with Pathyn is designed to feel creative and simple, even if you’ve never made a map before. In just a few minutes, you can turn a real-world location into a pirate adventure filled with paths, icons, decorations, and hidden treasure.
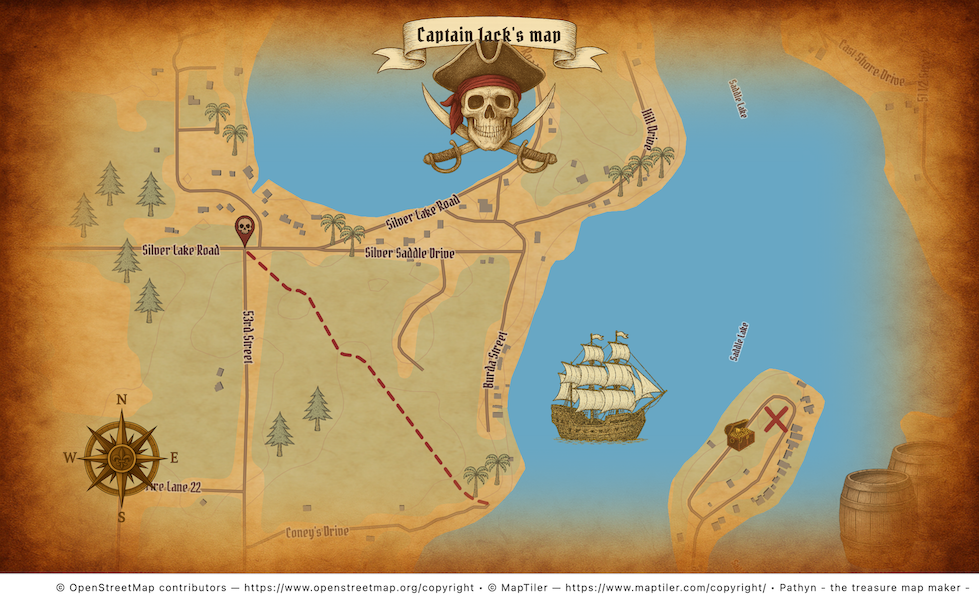
In our previous post we showed how to create a Halloween treasure map with Pathyn. For this post, we’ll create a classic pirate-themed treasure map.
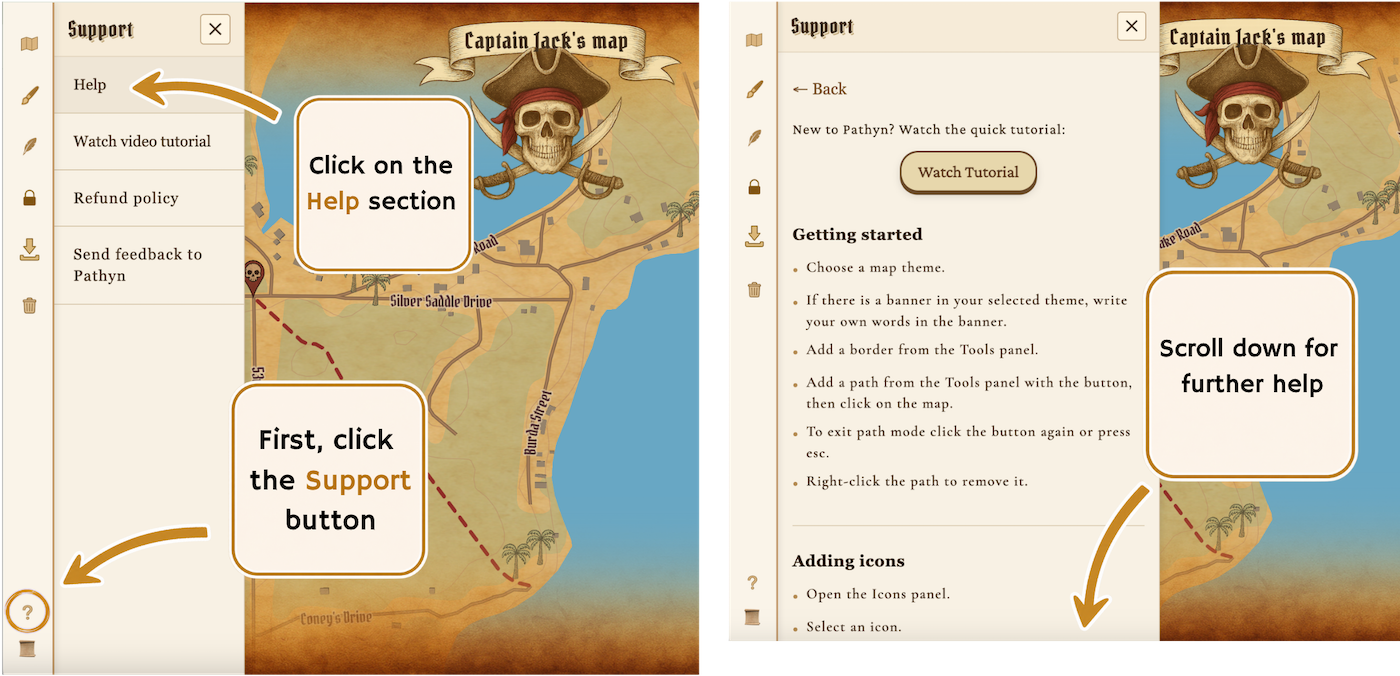
New to Pathyn? Open up the app here, and click the Support button in the lower left side (the question mark button). This will open up a Support panel (left image below). Click the Help section to open up a more detailed Support panel with guidance on how to make a treasure map (right image below).
See a quick tutorial video below. Scroll down to get tips on how to make a treasure map with Pathyn.
Step 1: Choose a Theme
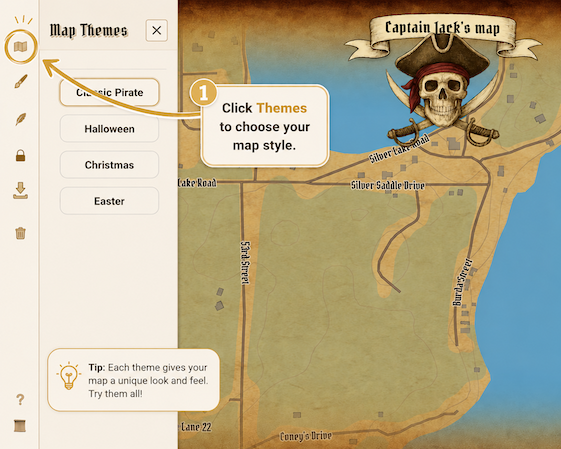
Open the Themes panel from the side rail to choose the overall look and atmosphere of your map.
For a traditional treasure map style, select the Classic Pirate theme. This adds aged parchment textures, pirate-inspired styling, and adventure-themed details that instantly make the map feel like part of an old expedition.
Different themes completely change the personality of the map, so feel free to experiment and find the style that best matches your adventure.
Step 2: Add a Title to Your Treasure Map
Every great adventure deserves a name.
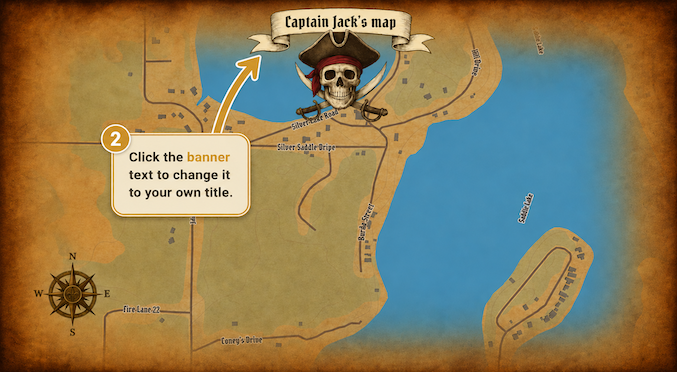
Click on the banner text at the top of the map and replace the default “Your text here” with your own title. This could be something dramatic like Captain Redbeard’s Lost Treasure, The Hidden Gold Trail, or The Great Easter Adventure.
Adding a custom title immediately makes the map feel personal and helps set the tone for the adventure ahead.
Step 3: Choose Your Map Location
Next, decide where your treasure hunt will take place. You can zoom and move around the map just like any modern map app.
If the location is different from your current area, simply drag the location pin to the place where you want your adventure to happen. This could be a local park, woodland trail, neighbourhood, beach, campsite, or even your own garden. Or right click to remove the location pin, and add a location pin yourself from the Icons panel.
Choosing a location with interesting landmarks such as pathways, bridges, or open spaces usually makes the treasure hunt feel more exciting and immersive.
Step 4: Add Icons and Treasure Markers
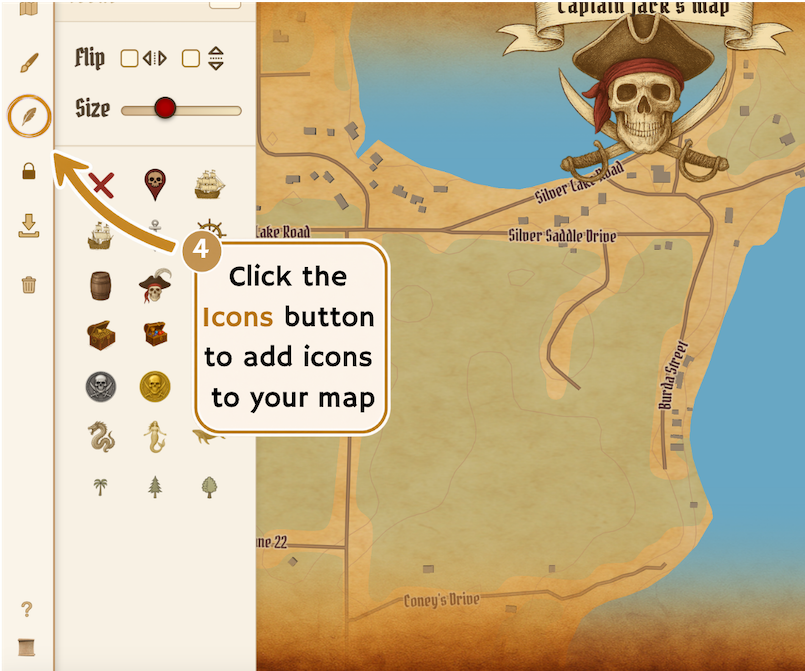
Open the Icons panel on the left side of the app to begin placing adventure icons onto the map.
This is where the map truly comes to life. You can add treasure chests, pirate ships, monsters, and many other themed decorations to build atmosphere and guide players through the journey.
The X Marks the Spot icon is unique and only appears once on the map, making it perfect for the final treasure location.
To place other icons, click on the icon of choice in the Icons panel and left click on the map while the selected icon is highlighted. Continue clicking for more icon placement. Right click to delete. To switch icons, simply select a different one from the Icons panel before placing more icons on the map. To change the size, drag the size slider to your size of choice and then click on the map to place the re-sized icon.
You can also flip icons using the flip option if you want objects like ships or markers to face a certain direction. Once you’re finished flipping an icon, turn the flip option back off before continuing to place more items.
There is a location pin that shows up on the map where you are located. If you want you can drag it somewhere else, or right click to delete it. There is also a location pin on the Icons panel if you want a new one or want to resize your new pin.
These small details help make every treasure map feel unique and personal.
Step 5: Draw Your Path
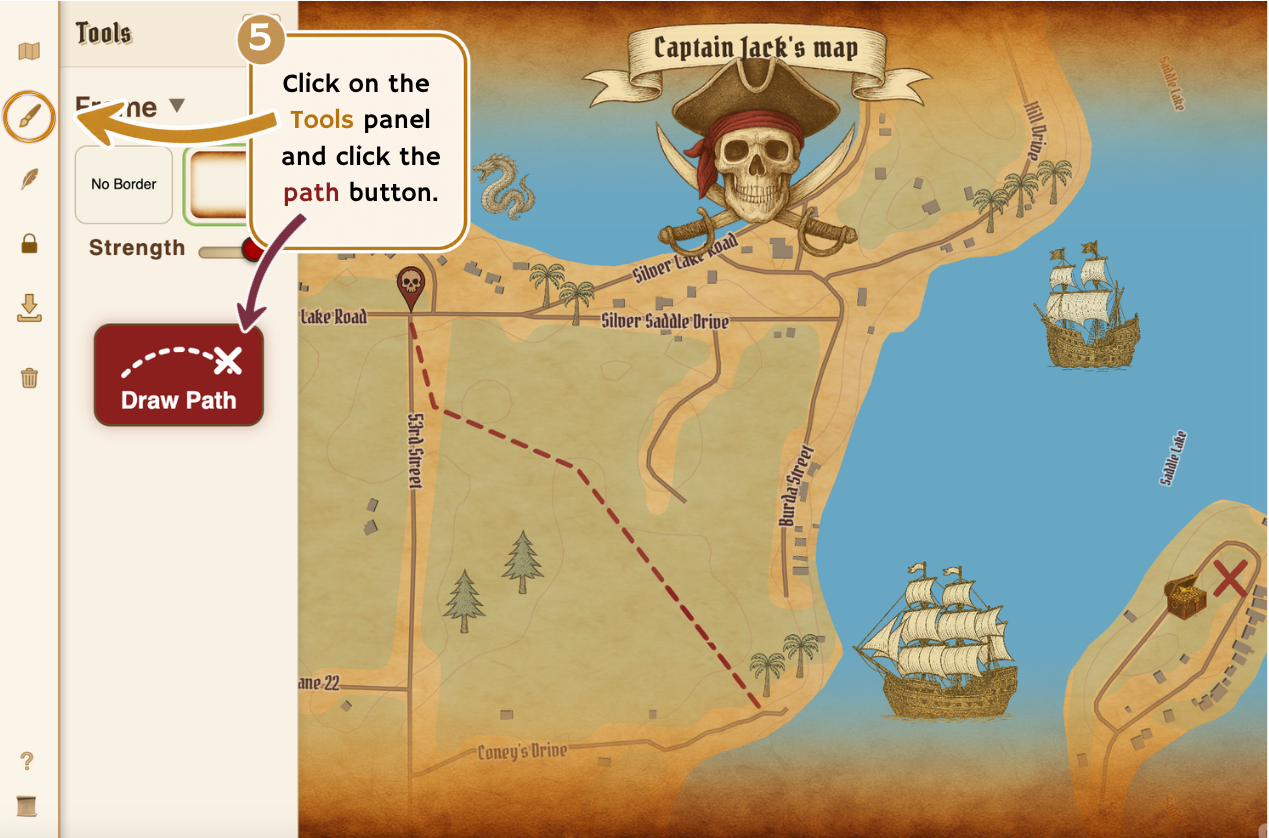
One of the most exciting parts of creating a treasure map is designing the route players might follow. Click the Path button to enter path-making mode. Then begin clicking on locations across the map to create your trail. Each click adds another point to the route, allowing you to guide players from one stage of the adventure to the next.
You might create a winding journey through a park, a mysterious route through woodland trails, or a short hidden path through your garden.
When you’re finished drawing the path, either press the Escape key or click the path button again to leave path-making mode.
The path helps bring structure to the adventure and makes the treasure hunt feel much more like a real expedition.
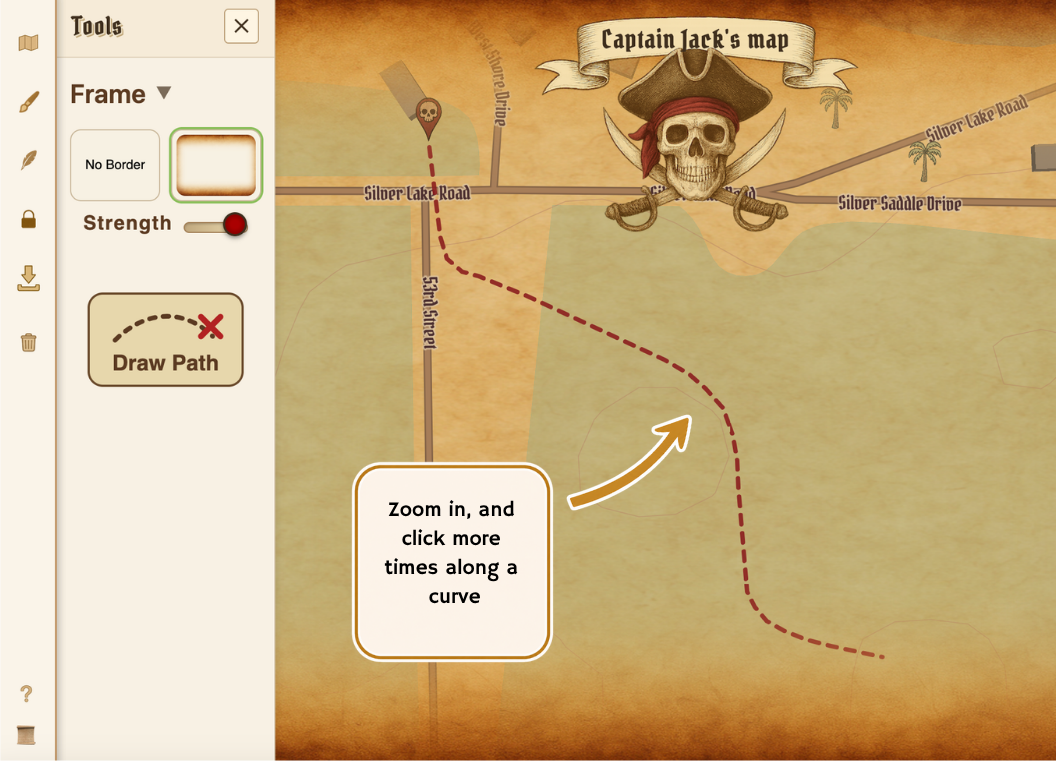
If you want to create a more curved path, zoom into the map, and click more frequently along a curve shape. When you zoom back out it will have a more smooth curve along your path.
Step 6: Decorate the Map
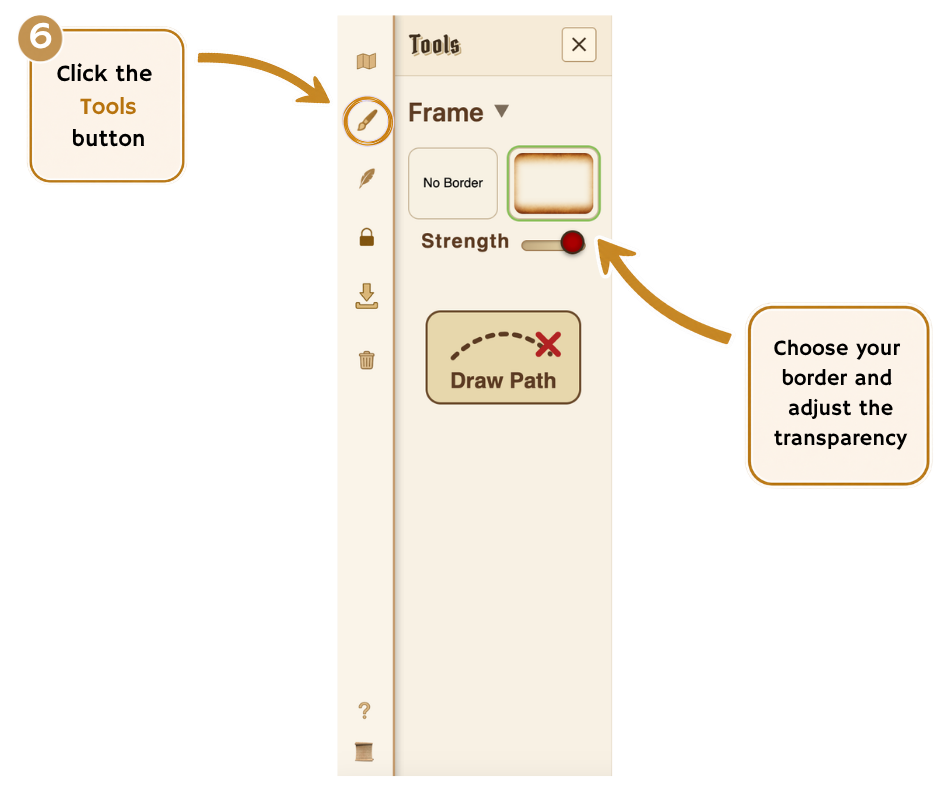
Open the Tools panel to begin customizing the appearance of the map.
Here you can choose whether to add a decorative border around the map or leave the edges clean and simple. If you don’t see any borders, click the Frame drop down menu to open up the borders. Click on the button of the border of your choice. Some treasure maps look best with a strong pirate-style frame, while others feel more authentic without one.
You can also adjust the transparency of the border using the Strength slider. Slightly transparent borders often help the map blend together more naturally while still keeping the decorative style visible.
Small visual details like this can completely change the mood of the finished map.
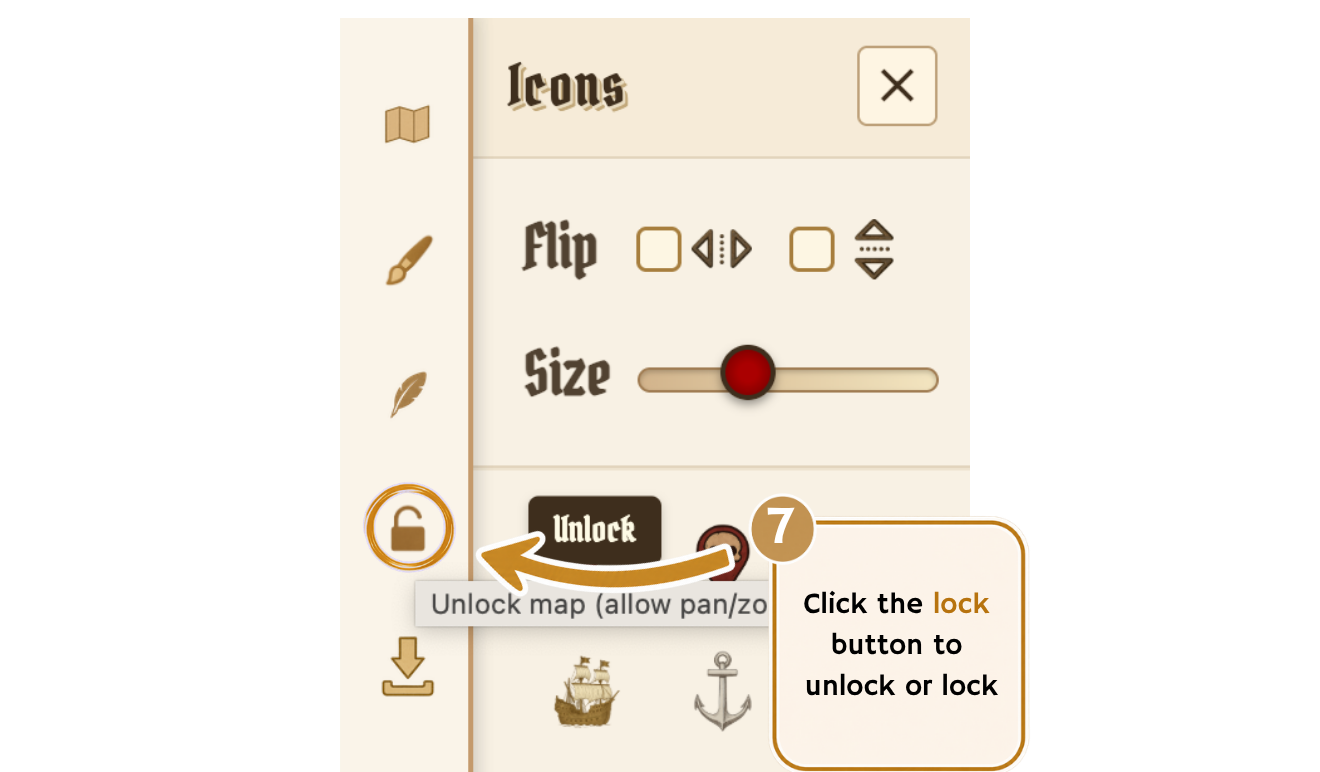
Step 7: Lock the Map While Designing
Sometimes while placing icons or decorations, the map may accidentally move or zoom when you don’t want it to.
If this happens, simply click the Lock button. This temporarily locks the map movement so you can focus on designing without accidentally dragging the map around. Click it again if you want to unlock the map zoom and pan movement.
This is especially useful when carefully positioning icons or fine-tuning your layout.
Step 8: Download Your Finished Treasure Map
Once your treasure map is complete, click the Download button.
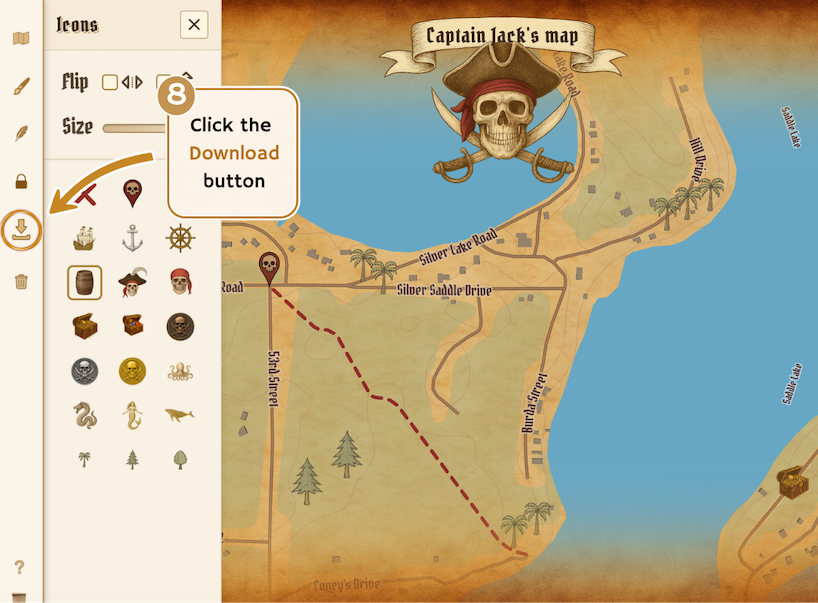
You’ll be guided through the checkout process, and after payment your high-quality treasure map will automatically download, ready to print or share digitally.
Many people print their maps and roll them up as scrolls, fold them like old pirate charts, or hide them inside envelopes to make the adventure feel even more real. Keep your eyes out for new features in the future at Pathyn!
Share Your Adventure
One of the best things about treasure maps is seeing the adventures people create with them.
If you create a treasure hunt using Pathyn, we’d love to hear about it. Whether it’s a birthday party, family trail, Easter egg hunt, or outdoor expedition, feel free to send us your story or photos.
We may even feature your adventure on the Pathyn site to inspire future explorers.
In our next post, we will provide details on how to set up a village scarecrow trail with Pathyn.
